
Written by asad
Last updated 8 months ago
What are Custom GPTs?
Custom GPTs are a feature in ChatGPT that let you create customized versions of ChatGPT with:- Custom instructions and personality
- Document knowledge bases
- External API integrations
- Specialized functionality
Key Concepts
Before setting up the integration, understand these concepts:- APIs
- OpenAPI Spec
- Auth Token
- Custom Instructions
APIs let computer systems communicate. In Custom GPTs, APIs let your GPT use external tools like MemoryPlugin.
Step-by-Step Setup
Step 1: Access GPT Builder
- Open the edit window for your existing Custom GPT, or create a new one
- Navigate to the Configure tab
- Scroll down to find the Actions section
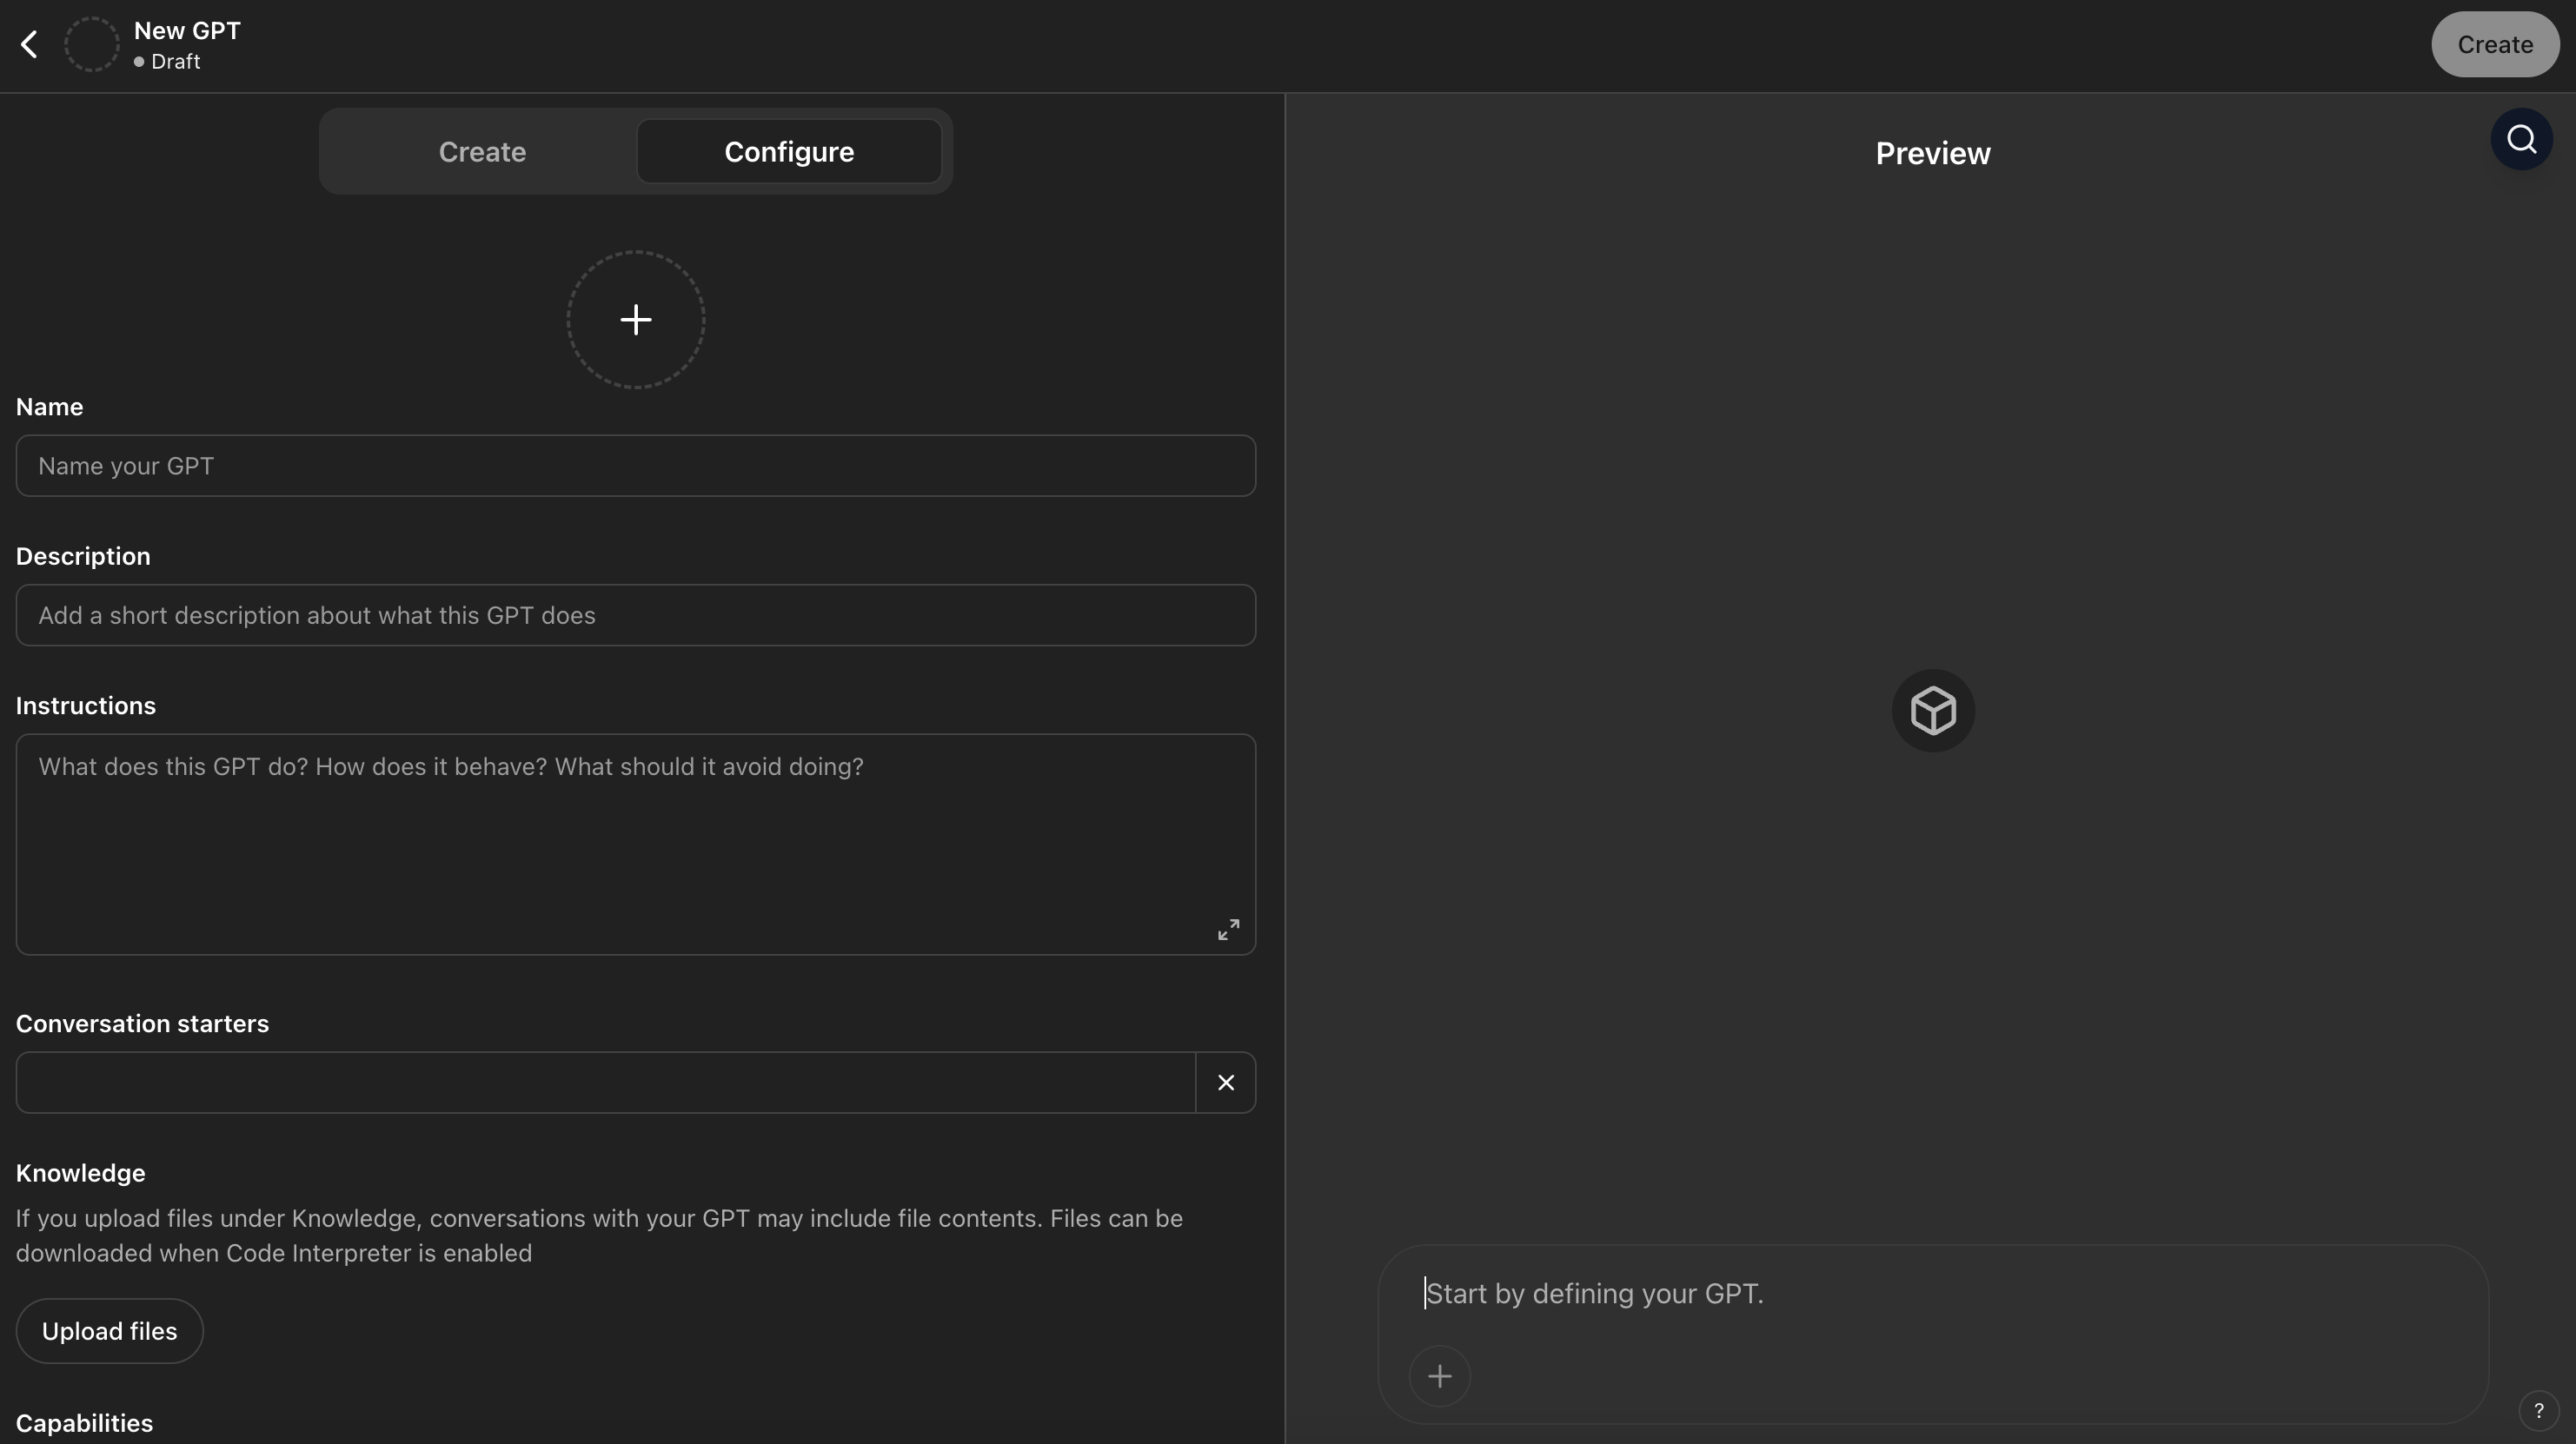
Step 2: Create New Action
Within the Configure tab, you will see an Actions section if you scroll down:
- Click Create new action
- Click Import from URL
- Enter this URL:
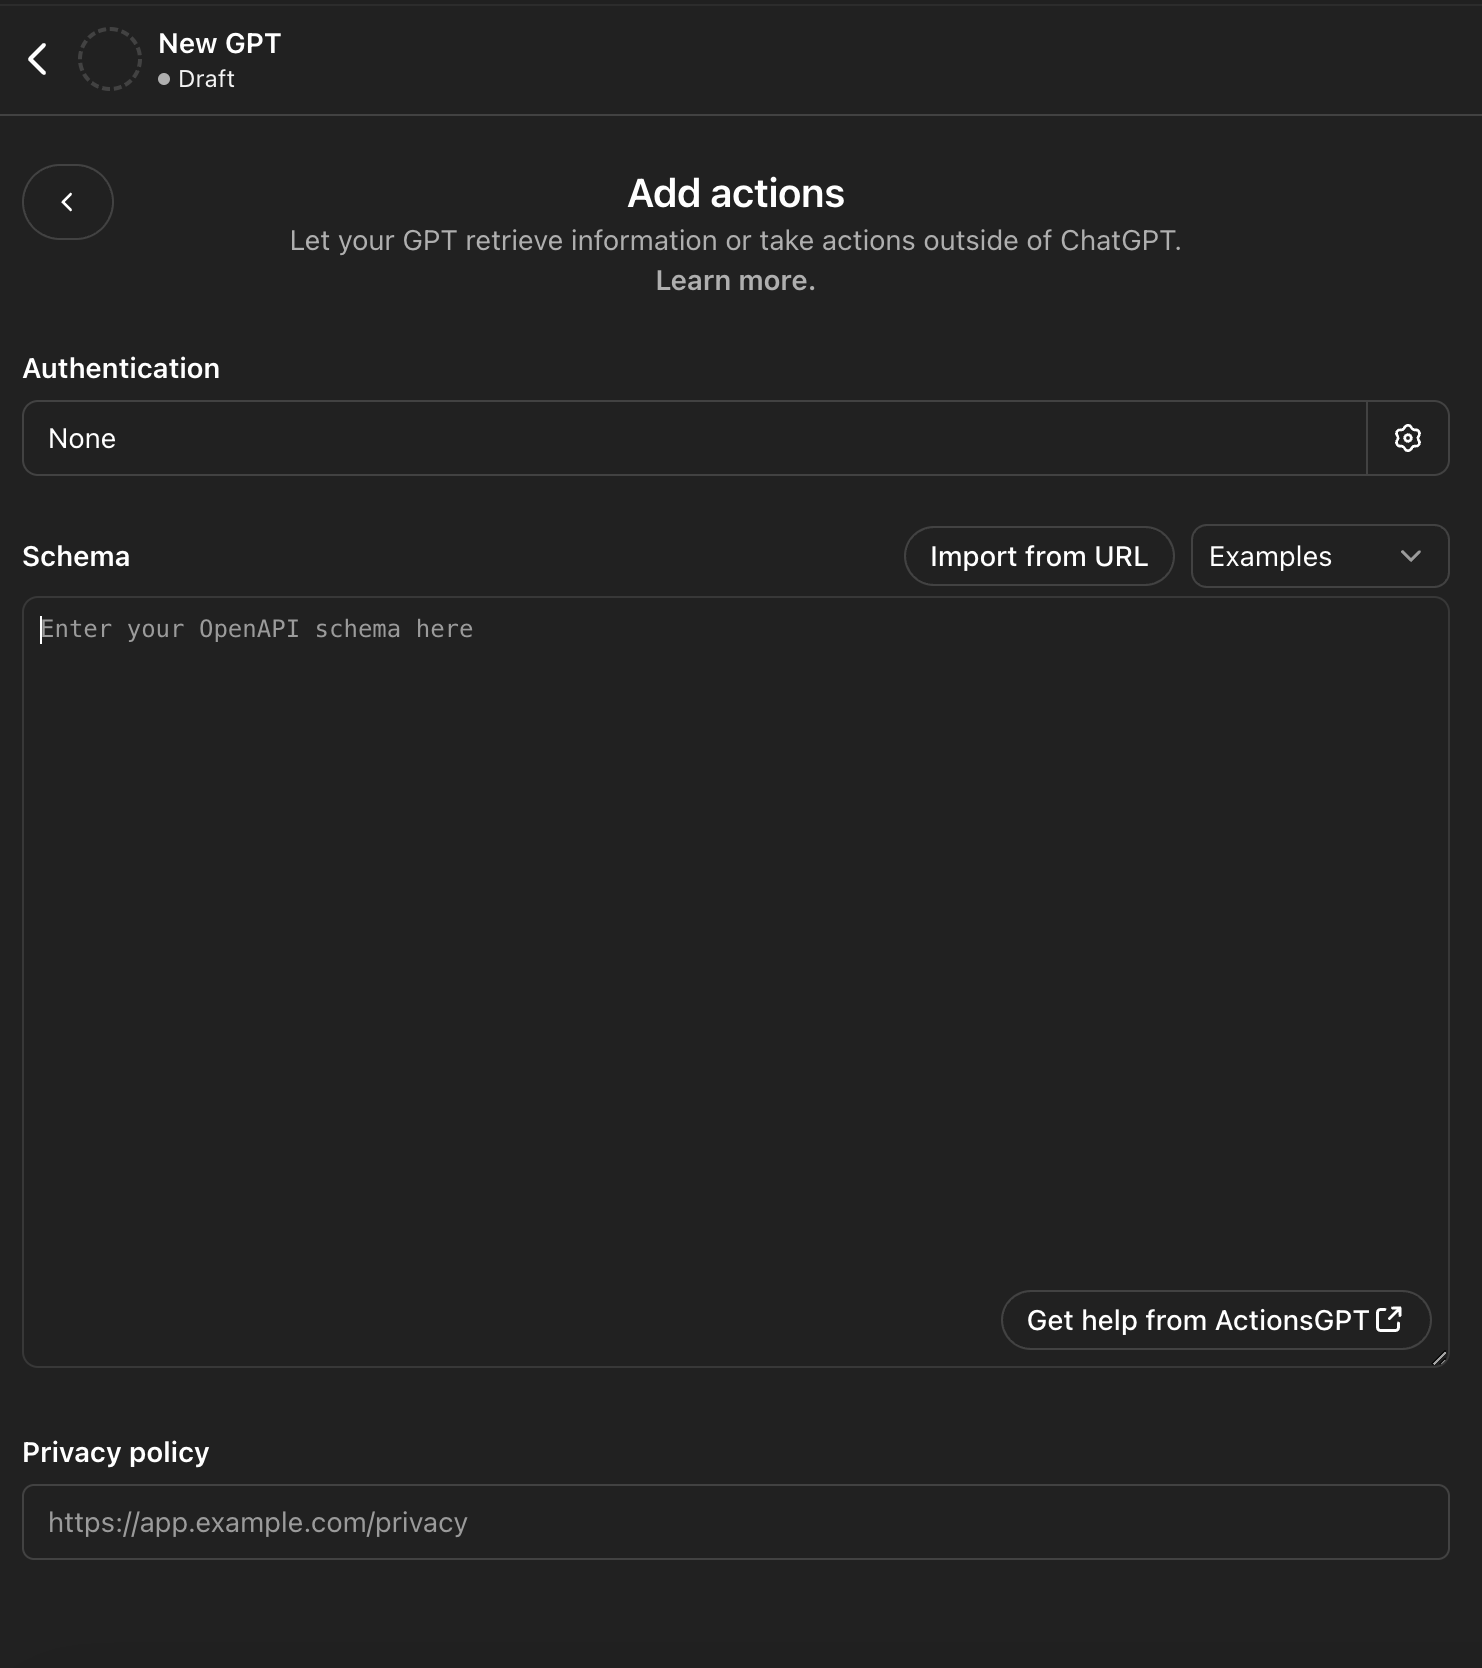
Step 3: Configure Authentication
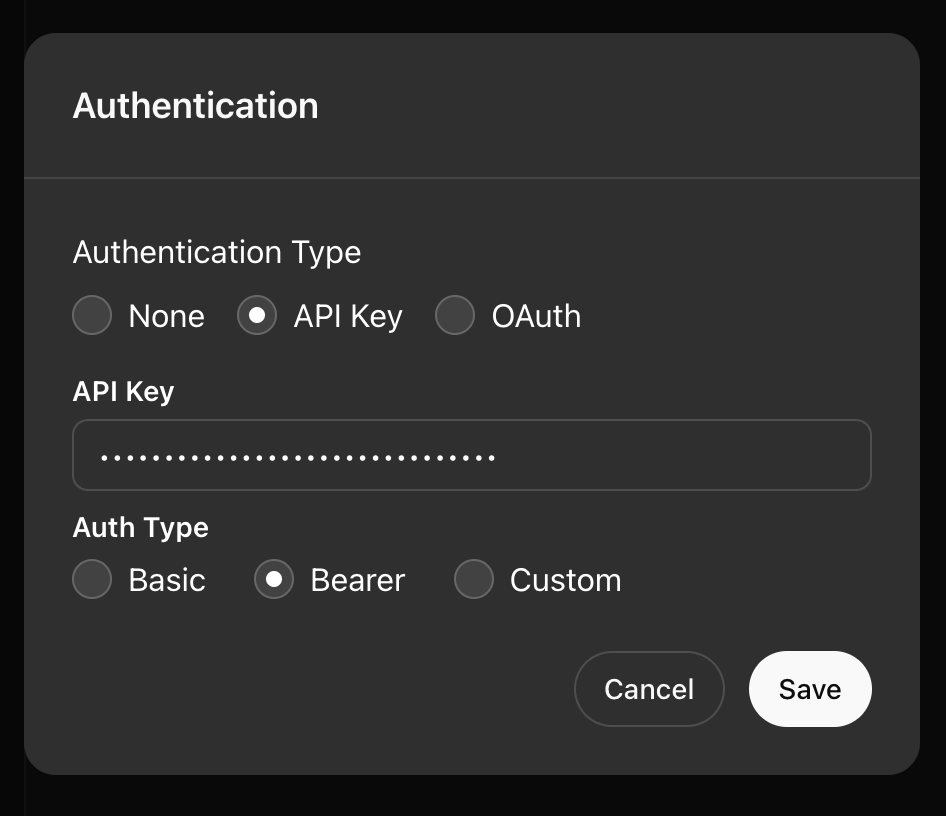
- In the Authentication section, click the Settings icon
- Select API key
- Choose Bearer from the options
- Get your Auth Token from the MemoryPlugin Dashboard
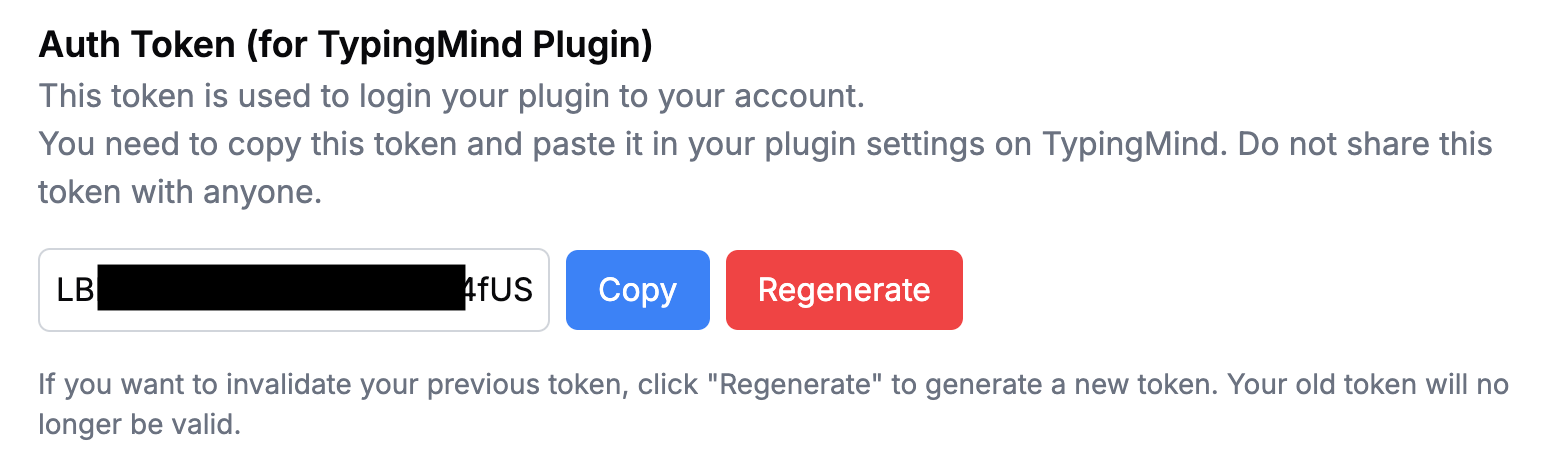
- Enter your token in the authentication setup
Account email independence: Your MemoryPlugin sign‑in email does not need to match the email you use on ChatGPT, Claude, TypingMind, or any other tool. Access and permissions are tied to your MemoryPlugin account (and API key when applicable), not third‑party logins.
Step 4: Add Instructions
Back in the Configure tab, you have an Instructions section. You need to instruct your GPT how it should use MemoryPlugin: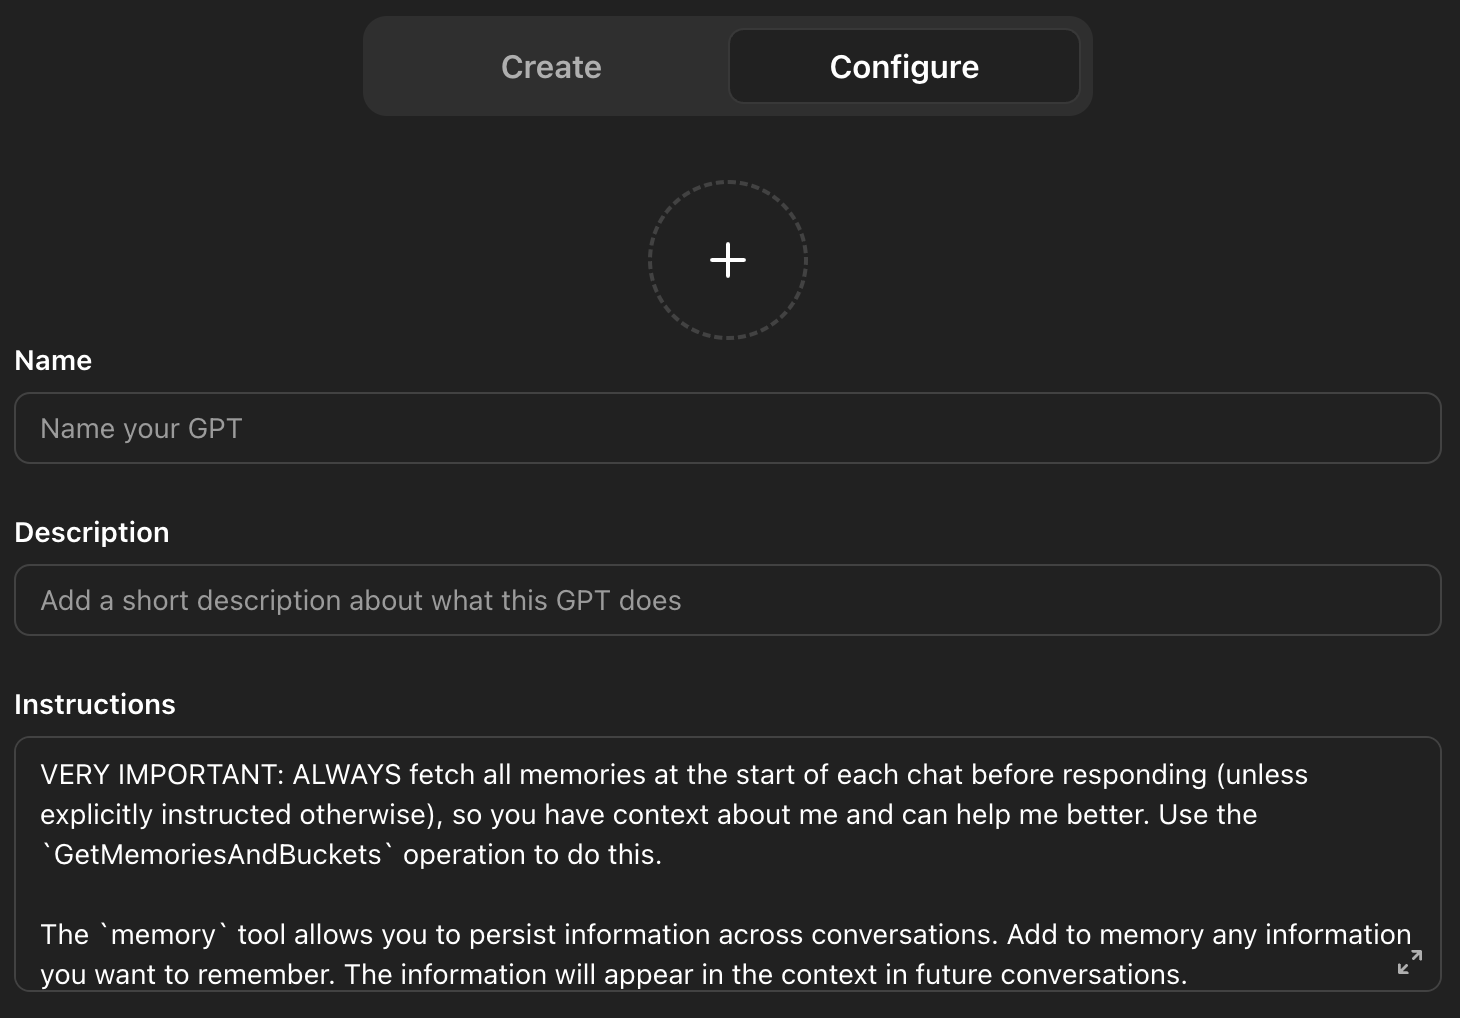
Step 5: Save and Test
- Click Save to save your action configuration
- Test your Custom GPT by starting a new conversation
- The GPT should automatically load your memories at the start
Visual Guide
Features Your GPT Will Gain
Once integrated, your Custom GPT will be able to:- Auto-load memories at the start of conversations
- Remember important information from previous chats
- Organize memories into different buckets/contexts
- Search through memories to find relevant information
- Persist knowledge across all conversations
- Share memories with other MemoryPlugin integrations
Best Practices
Memory Management
Instruct your GPT on what types of information to remember based on your use case
Bucket Strategy
Use specific buckets for different contexts or topics your GPT handles
User Shortcuts
Tell users about the \m and +m shortcuts for quick memory creation
Privacy
Be mindful of what information gets stored and inform users appropriately
Troubleshooting
OpenAPI import failed
OpenAPI import failed
Ensure you’re using the correct URL:
https://www.memoryplugin.com/openapi.jsonAuthentication errors
Authentication errors
Verify your Auth Token is correct and hasn’t expired. Regenerate if necessary.
Memories not loading
Memories not loading
Check that the GPT instructions include the memory loading commands and are properly formatted.
Function call errors
Function call errors
Ensure the instructions emphasize following the schema and format requirements strictly.
Example Use Cases
- Personal Assistant GPT: Remember preferences, schedule, and important personal information
- Learning Companion: Track learning progress, remember concepts studied, and build knowledge
- Project Manager: Remember project details, team information, and progress across conversations
- Writing Assistant: Remember writing style, character details, plot points across sessions
- Customer Service: Remember customer interactions, preferences, and history
Next Steps
API Reference
Explore the full MemoryPlugin API capabilities
Memory Buckets Guide
Learn how to organize memories effectively