

Import memories
Import loads memories into one bucket at a time: the bucket you have selected. A pill in the dialog’s header confirms the target (“Saving to ”) so you always know where the memories are going. There are two modes, switched with a toggle at the top of the dialog: Upload file and Paste text.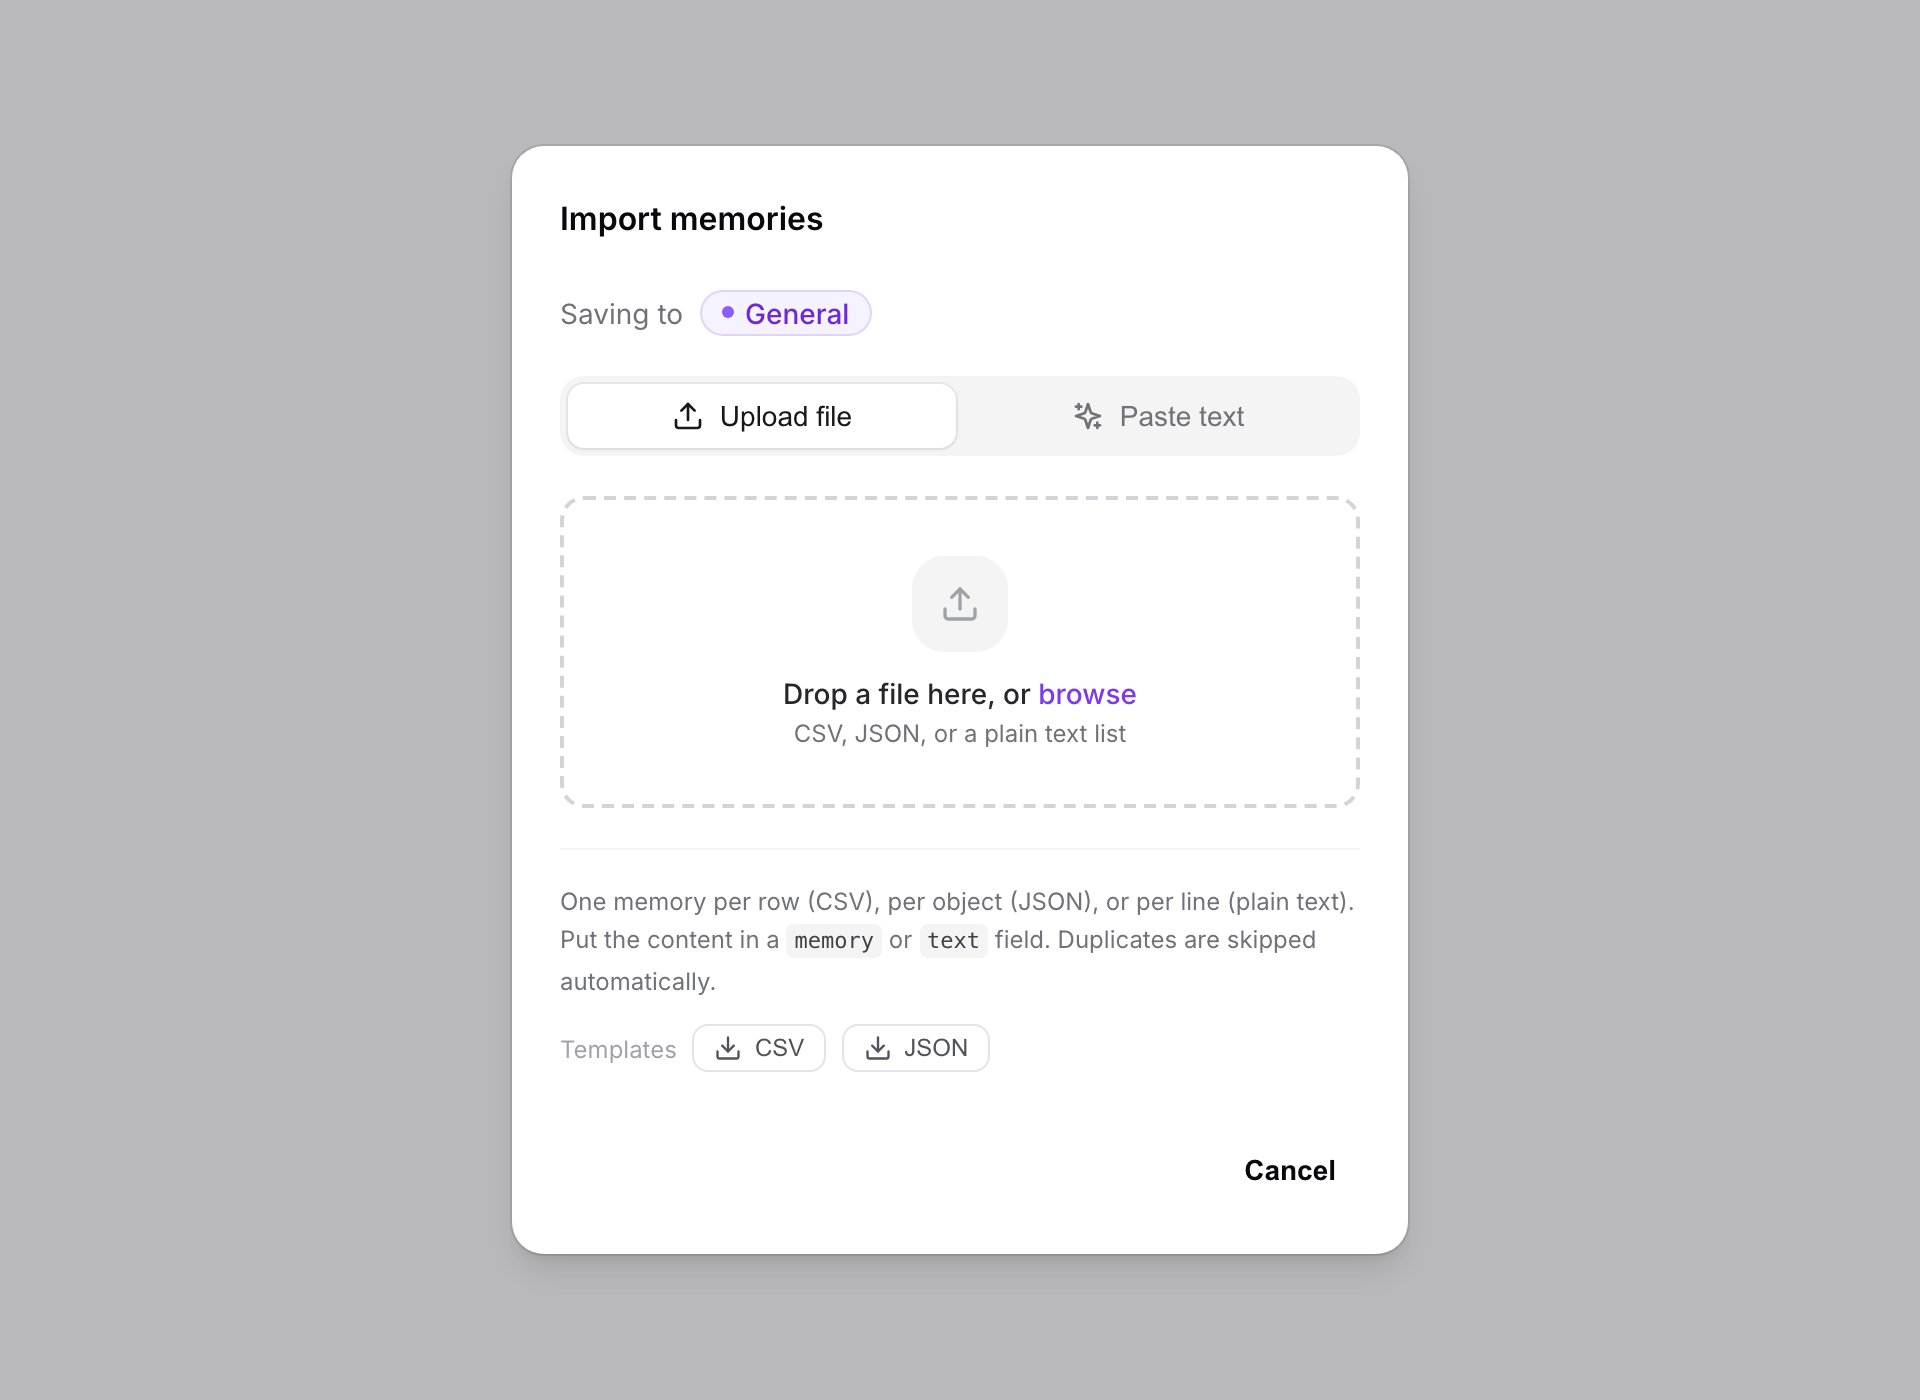
The Import Memories dialog: a Saving-to pill confirms the bucket, and the toggle switches between uploading a file and pasting text.
Upload a file
CSV
One memory per row
JSON
An array of memory objects
Plain text
One memory per line
.csv, .json, and .txt, with drag-and-drop. The format is auto-detected, and the dialog offers downloadable CSV and JSON templates if you want a starting point.
CSV format
Use a header row with atext or memory column (if both are present, memory wins):
createdAt (or created_at) column to set each memory’s timestamp. Any other columns are ignored. A file without a recognized header isn’t rejected; it falls back to one memory per line.
JSON format
JSON imports expect an array of objects, each with atext (or memory) field:
createdAt field sets the timestamp. Other fields are ignored.
Paste text instead
The Paste text mode is for notes that aren’t one-per-line yet: paste anything (meeting notes, a markdown doc, a braindump), or drop in a.md or .txt file, and click Extract memories. An AI pass splits the text into discrete memories, which you review (and prune) before saving. Nothing is stored until you click Save.
How to import
1
Select the target bucket
In the dashboard, select the bucket you want the memories in (or use General). Import always writes to the selected bucket.
2
Open the import dialog
Click Import in the memory list header. The Import Memories dialog opens.
3
Choose your file (or paste text)
Drop in or select a
.csv, .json, or .txt file; MemoryPlugin parses it and shows how many memories it found. Or switch to Paste text, paste your notes, and click Extract memories to have the AI split them for review.4
Save
Click Save memories. When it finishes, a summary shows how many were imported, plus any duplicates or invalid entries that were skipped.
Duplicates are skipped automatically. Memories that already exist are not imported again, so re-running the same file will not create duplicates. If the bucket uses Smart Memory, categories are assigned to the new memories automatically.
Bulk add (no file needed)
For a handful of memories you do not want to put in a file, use bulk add instead:1
Open the Add Memory dialog
Press ⌘J / Ctrl+J, or click New Memory in the sidebar.
2
Turn on bulk mode
Check Bulk mode (one per line).
3
Paste your memories
Put one memory per line, then save. Each line becomes its own memory.
Export memories
Export is opened from the memory list header. Export covers the current bucket; if you have selected specific memories first, the button becomes Export Selected () and only those are exported.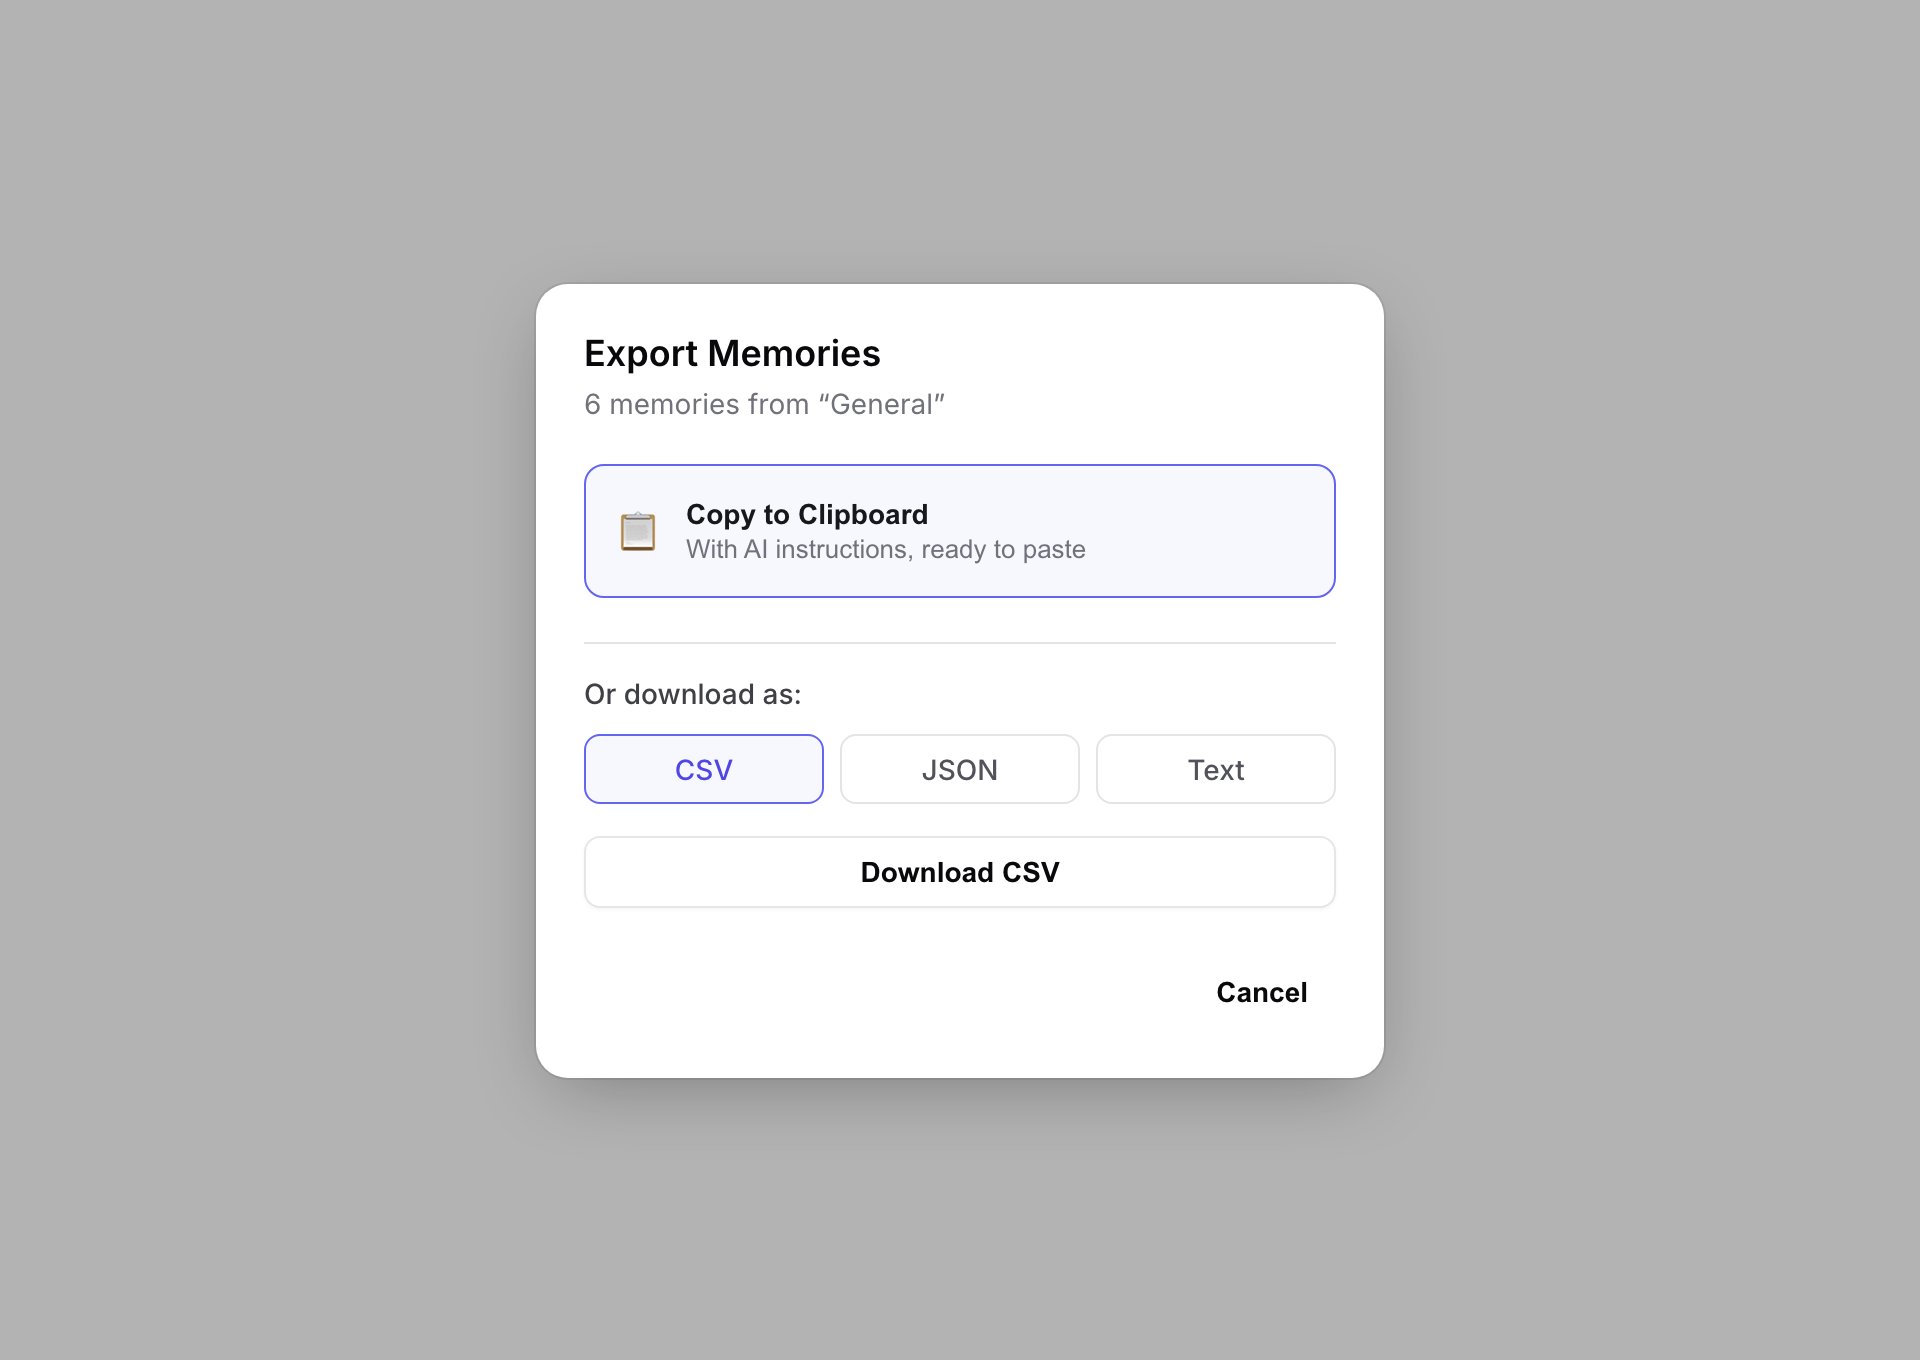
The Export Memories dialog. Copy to Clipboard is the primary action; you can also download as CSV, JSON, or Text.
Copy to clipboard
The primary export action is Copy to Clipboard. It copies your memories along with AI instructions, ready to paste straight into a chat with any AI tool. Use this when you want another AI to read your memories directly, not when you want a file.Download as a file
To save a file instead, pick a format under “Or download as:“:
A CSV export has the columns
text, createdAt, bucketName, and categoryName, so it carries each memory’s text, timestamp, bucket, and Smart Memory category.
Export specific memories
1
Select memories
Use Select Multiple in the memory list header, then check the memories you want.
2
Export the selection
Click Export Selected ().
3
Copy or download
Copy to clipboard with AI instructions, or download as CSV, JSON, or Text.
Use cases
- Backup. Export a bucket now and then and keep the file somewhere safe.
- Migration. Export from one account, import into another.
- Sharing. Hand a colleague an export, or use Copy to Clipboard to paste your memories into their AI chat. (For live shared access, see bucket sharing.)
- Analysis. Export to CSV and dig through your memories in a spreadsheet.
Tips
Clean the file before importing
Clean the file before importing
Fix formatting and drop obvious junk in the spreadsheet first. It is easier than editing memories one at a time afterward.
Import goes to the selected bucket
Import goes to the selected bucket
There is no per-row bucket column. If you want memories split across buckets, import each set with the right bucket selected, or move them afterward.
Back up periodically
Back up periodically
A quick export is cheap insurance. It is your data; keep a copy.
Test a large import small
Test a large import small
Try a few rows first to confirm the format parses before importing thousands.
Next steps
Memory Buckets
Organize your imported memories into buckets
Bulk Operations
Select, move, and delete many memories at once